Saturday, March 3, 2007

Shop Notes:

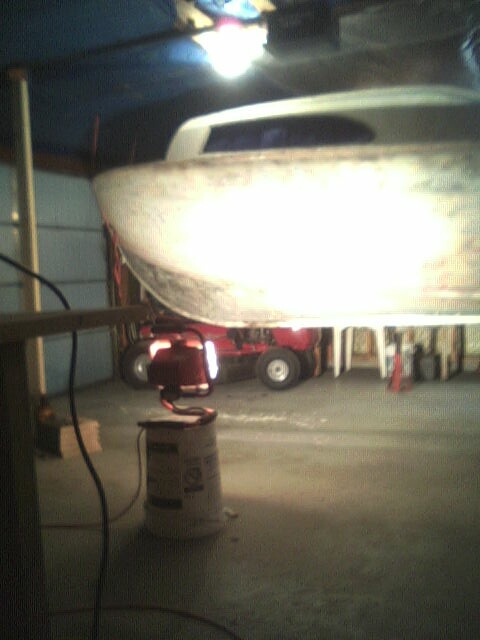
I've been working on the fuel cell's enclosure again. Ever since I made the decision to locate the fuel cell in the cabin under the bed I've been concerned about a few issues like.... how will I design the enclosure..? how will it balance and support the weight (approx. 160 + pounds full of fuel) as well as the weight of two people in the cabin (on top of the fuel cell) and so on..?

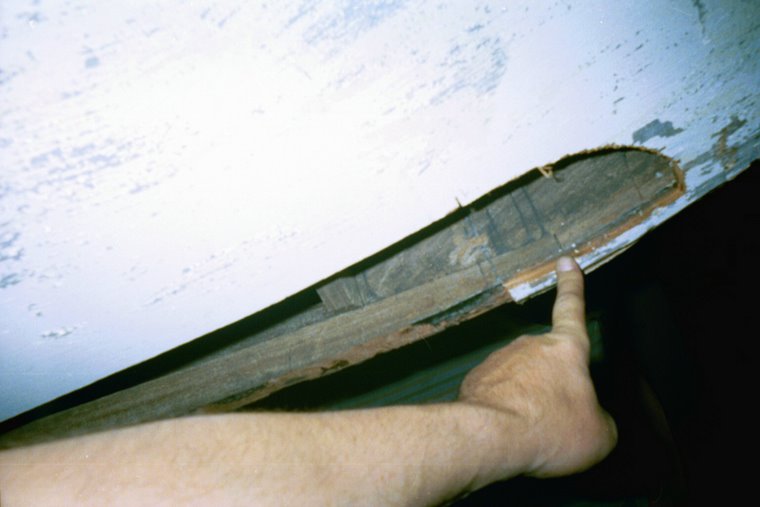
I designed the box some time back using 3/8" plywood but, still have been concerned about the weight factors. I've needed to create something to support this weight without causing any undue stress. I've been considering how the cabin floor is supported but, can not see enough room in the bilge to utilize braces in the same manner. I do need to spread this weight out as much a possible though.


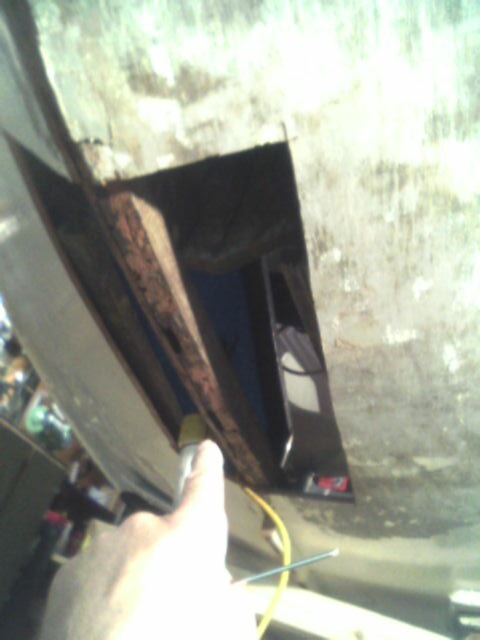
I came up with what I refer to as a bridge.

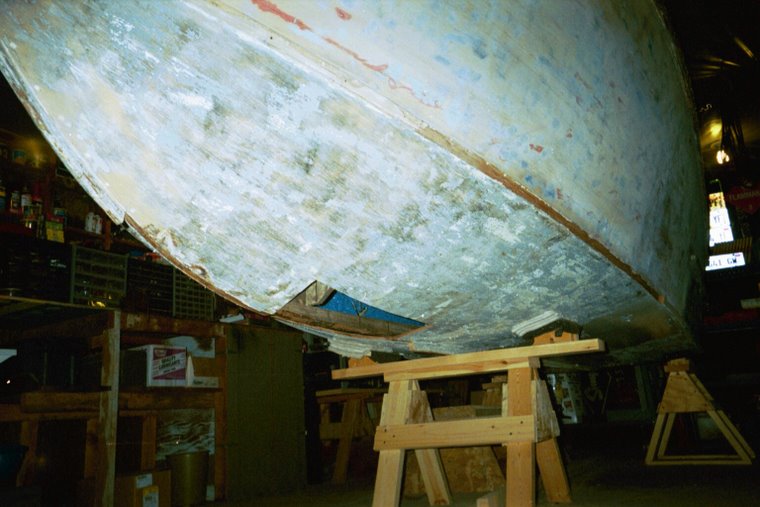
The idea is to spread out as much of the weight as possible across the keel itself (the strongest element in the bilge at this point in the boat).

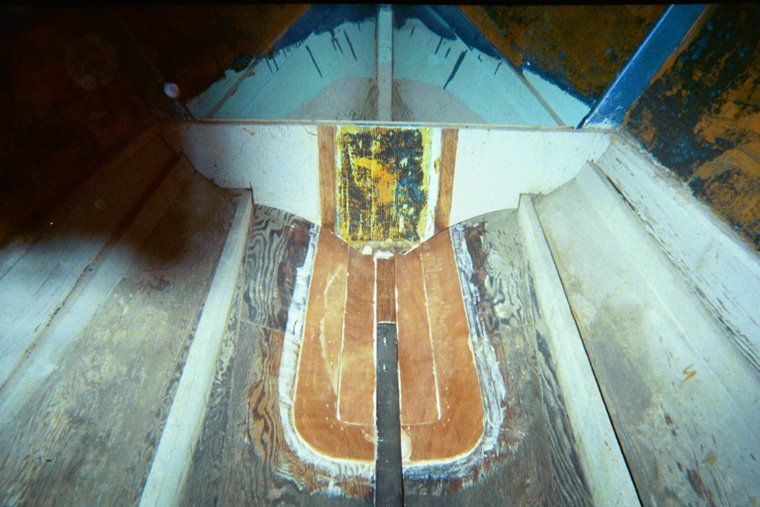
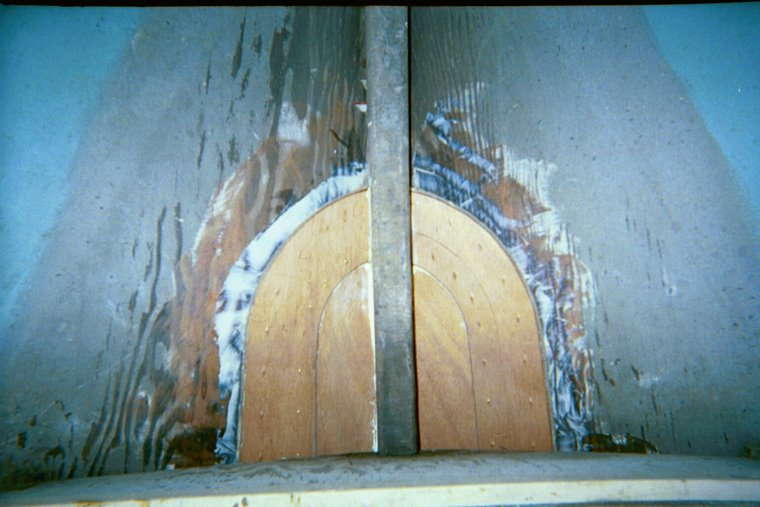
It's designed to attach directly under the fuel cell's box and sit directly on the keel.

The fuel cell is 47" long and 18" wide. It is supported and enclosed by it's box which "hangs" from and between the first and second bulkhead in the cabin.


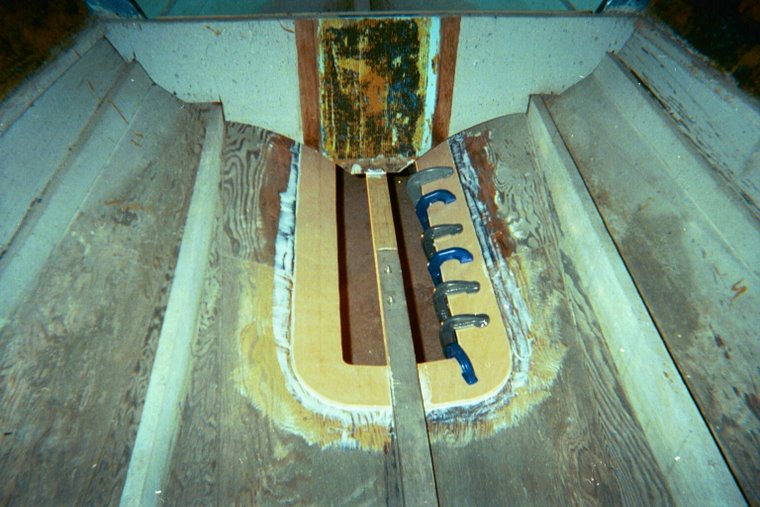
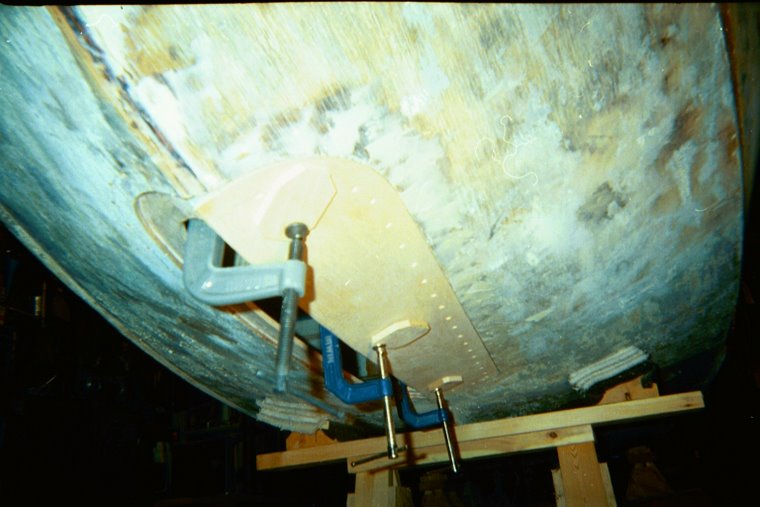
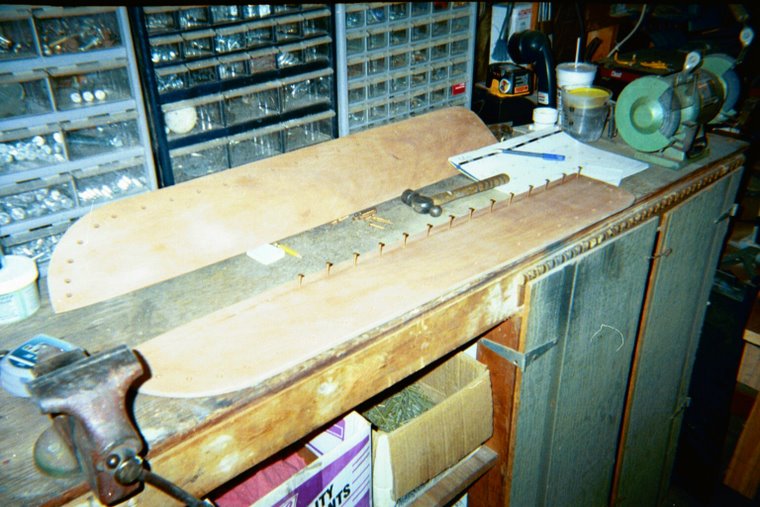
The bridge is approx. 27" long and 6" wide on top. The center of the bridge itself is constructed of one piece of 3/4" mahogany in the center, sandwiched by two pieces of 3/4" plywood. The top and bottom are 3/8" ply... the bottom piece being just wide enough to cover the width of the keel while the top piece being a bit wider will support the the weight being transferred through the bottom of the box. The plywood on the bottom of the bridge (being softer than the keel) will eventually compress if it is stressed... sort of "adjusting" or "seating" itself, at least this is how I imagine it to work.
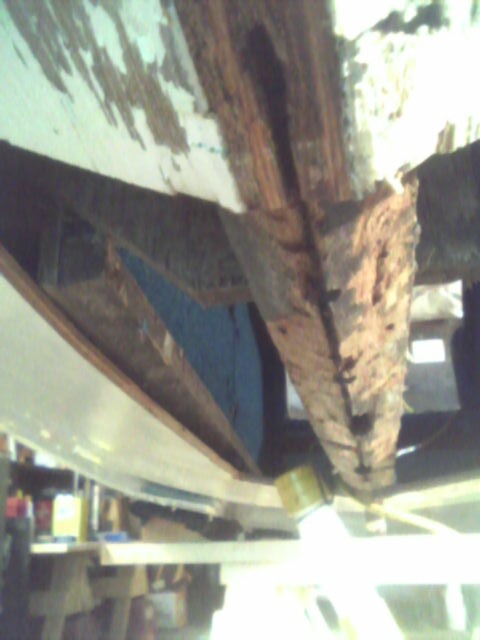
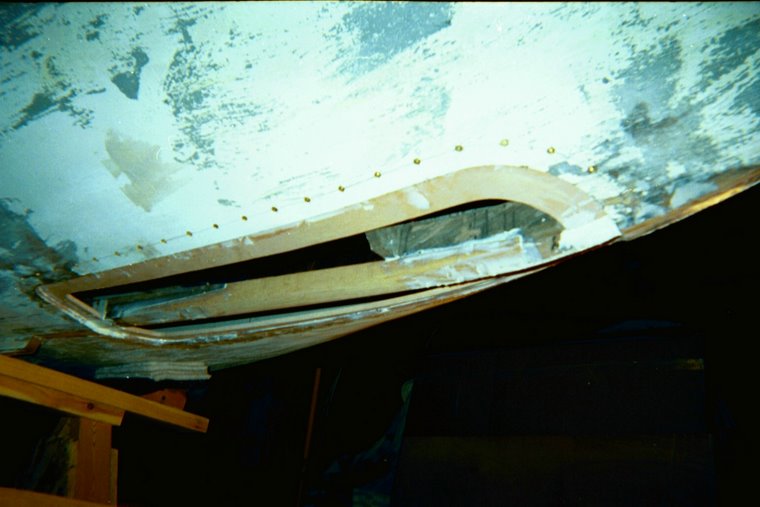
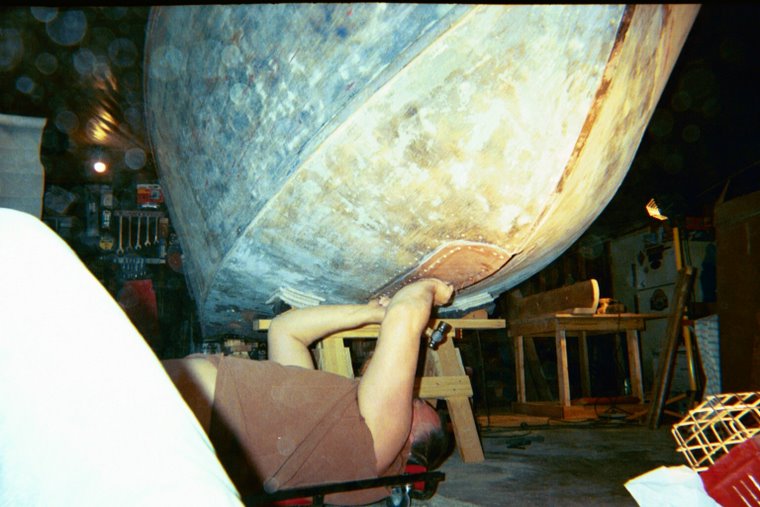
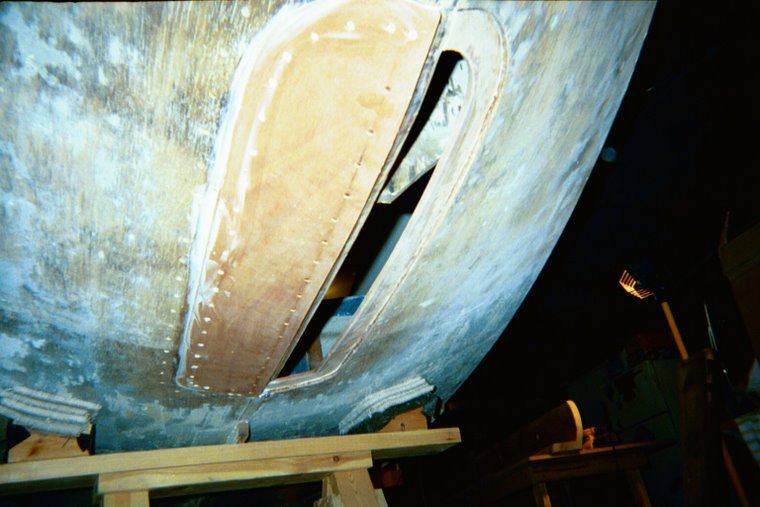
In this picture you can see the bridge sitting in it's position on the keel. The piece of 1" x 2" was used to check clearance across the entire length of the box... It fit really... really good !
This should work very well.

Thursday, March 1, 2007

Shop Notes:

New hatchway dryfitting.

Today, and the last few days, I've been able to work a bit on the boat. Not as much as I'd like though. Sometimes, it's just better to walk away for a time, which is probably what I should have done the other day when Mr. Murphy slipped in to visit. Things have been slow going all week.
New Bulkhead Dryfitting.

I have worked (on and off) on the hatch cover as well as the new bulkhead and today I've focused on the fuel cell incloser too. You'll see in the pictures that I've made a little headway... kicking and screaming all the while..... ;(

Fuel cell incloser roughed in.


Fuel cell getting a test fit.

I have constructed most of the lid for the hatch and it's looking fairly nice so far.
Sooner or later everything will come together and actually be assembled permantly... still have a ways to go though. I have to fabricate a dash as well as the seating (at least the supports for the seats), coat everything with CPES and then at some point soon after I'll be purchasing some sandable primer to apply to the entire inside of the boat... Hulls, Cabin sides, Beams, Bulkhead... the works. I'll have to have a good start on the dash and the seats before this can happen though. Untill next time..... :)

Tuesday, February 27, 2007

Shop Notes:

Shop safety.
No... I didn't hurt myself yesterday, and murphy didn't get me either.

Shop safety is always important. I'm sure that everyone's heard your supposed to wear safety glasses... blah blah blah... Well, I believe in shop safety. I can't swear that I ALWAYS put on my safety glasses when I fire up a saw but, I can say that I should! Safety glasses are really a must... one doesn't realize how important or sensitive his or her eyes are untill one or both of your eyes are damaged. Working in a machine shop many years ago, using diamond studded grinding wheels, I wound up with a piece of a diamond inbedded in my eye. This wasn't life threatening but, it did require a trip to the eye doctor to have it removed from my cornea. Sawdust, metal shavings, wood chips and splinters all pose a real threat to our eyes.
Loose clothing is a definite no no ! Jewelery (big rings, necklaces) is not smart either.

When using saws (bandwaw, table saw, jointers etc.) a push stick is always smart. When I first bought my band saw I wanted to play around with it, experiment cutting little things. One of the first things I made was a simple push stick to keep my hands and fingers away from the blade.
I can honestly say that many times in my life I've had to make due without the use of one or more of my fingers or a hand... even an arm ! (I still have both arms and hands as well as all 8 fingers and both thumbs). I've had 4 broken arms. I've also broke, cut, gashed, smashed and whatever else you can do to terrorize one's hands and didgets many times over in my life time. Trying to tie one's shoes is a real bummer with only one hand.

I keep a medicine cabinet in my shop (with a mirror) stocked with peroxide, bandages, gauze... the bare essentials to patch something up if needed, at least untill I can get to the hospital, if needed. The mirror is handy too. Even wearing saftey glasses, you are still going to get something in your eye once in awhile, especially when your on your back under the truck and looking up ..................................................

Shop Notes:

Yesterday was a disaster... more or less but, a disaster.
I was trying to re-fabricate the individual pieces that make up the hatch cover ( a completely new hatch) and could not make the simplest of anything without messing it up. The hatch face I made three times... this is just a piece of plywood approximately 5" x 24" rectangle shaped, nothing fancy... no bevels... or curves... or radius'... just a rectangle. Three times... :(

Today will be better and, I hope to finish the hatch cover pieces and move on to the bulk head.

Monday, February 26, 2007

Murphy... I know your in here !

Ever have one of those days when you know that Mr. Murphy is lurking somewhere behind you watching everything you do, and he's making sure that you can't do anything right ?
Well, he's in my shop right now. It seems that I cannot perform the simplest of tasks today. I've messed up everything that I touch... Everything !

Sunday, February 25, 2007

Shop Notes:

Yesterday, I installed the remaining floor braces and then the cockpit floor itself. The floor consists of two layers of 3/8" plywood. The plywood was completely treated (both sides as well as all edges) with CPES to prevent water damage, and it will surely see it's share of water. The first layer was layed out and stapled with galvanized 1/4" x 1 1/4" crown staples basically at the corners and centers of each side to keep it flat until the second layer could be layed out and fastened. Each layer consists of two pieces of ply... one fore (running the full width of the floor) and one aft (likewise). Each seam is positioned directly above a brace. The seam on the first layer is positioned forward of the center (athwart ship) of the floor while the seam of the second layer is positioned aft. The second layer is secured every 5" all the way around each piece with SS #8 1 5/8" screws predrilled and counter sunk.

In the very back, the first 15"-18" forward of the transom is a separate piece of plywood (single layer) left unattached for access to the bilge. This piece will eventually have holes cut into it on either side of the keel for bilge pumps. The keel is solid (no holes connecting the bilges) so a separate pump for each side is necessary. This is also where the batteries will be mounted, one on each side, to the outside near the hull.


Now that the floor is in, I can grab my trusty bucket (an upside down seat) and start to heat and dig out the epoxy plugs on the cabin sides to tighten them up. There are 13 screws on each side. I got no less that 1/4 turn out of every screw and as much as an entire full turn out of some and, all but one tightened down. I had to remove one that was stripped and re-drill for a new screw.

Later, I decided to take a look at the hatch. This thing is crooked and it's been bothering me for some time as to whether or not I should mess with it. I can't stand it... The wood around it (coaming ?) is rotted in places and it's just not square...

So, I started by removing all of the trim around the opening. I grab my square and straight edge and start studying this picture. I think this procedure requires a beer. Drink beer while looking at square crooked hole. Think..... think..... measure this.... measure that.... drink... think.... measure... you get the picture, right. Finally, I decide to start with the upper left (looking aft) corner of the hatch opening. I figure that I'll start with this corner and square everything else to it. So, with straight edge in hand, I begin to mark off excess wood that will need to be removed. I grab a rasp and my surform and start to shave off said wood. Remove a little wood here... a little more there... a slight cut from the jig saw in a couple of corners, a little more shaving and whalla ! SQUARE.

I can live with it now. Time to call it a night.