Saturday, February 24, 2007

Hats off to Dave "Rational Root"

I recently mentioned that I've ran across another blog where "Dave" is building his own boat by scratch. See his link on the left (Daves Boat). Dave lives in Ireland. It is cold in Ireland and even in the summers it doesn't get real hot I gather. If you read some of his blog you'll see that he doesn't have a garage or shop. Dave is building his boat outside... in his yard.


This post is sort of my "HATS OFF" salute to Dave.

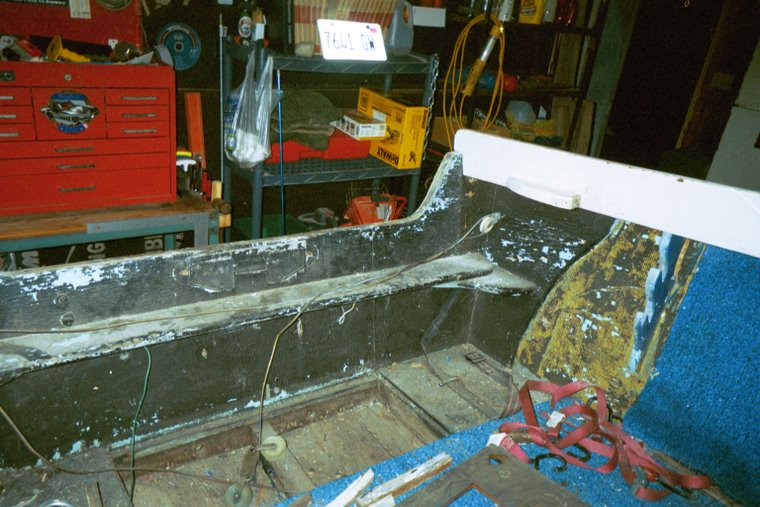
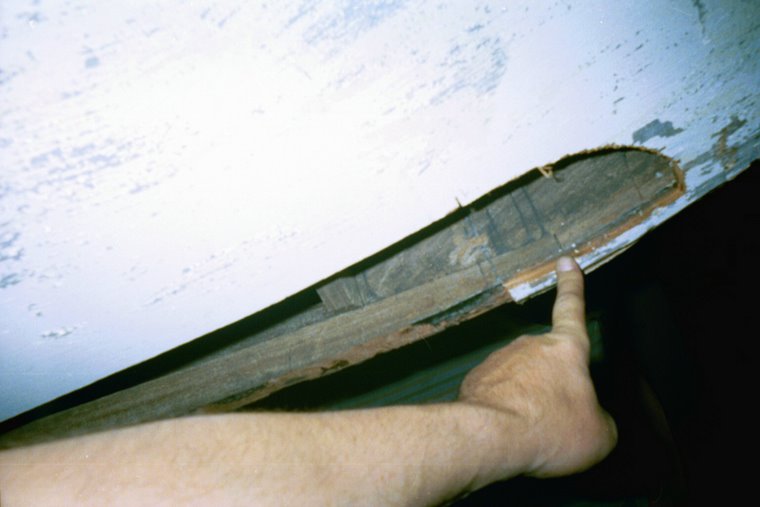
My wife and I moved into our current home about 9 months ago. We previously lived in a house that "sucked" with a grand garage... 24' x 36". The garage/shop was actually bigger than the house ! Anyway, we wanted a larger / better house and had searched for 6 months or better until we found this one, and bought it. The point that I'm trying to reach with this paragraph is that we could have settled on many other houses (nicer houses) a lot faster... but, I needed my "SHOP" space to work on my boat. My boat was mostly bare wood at that time (on the outside) and I didn't want it exposed to the weather until it was finished.

Dave is building his boat outside... ! It's dark when he gets home from work. He has to drag his tools out to work, run power cords, set up lighting, perform his work in in the midst of half light and half shadows and then has to put everything away each and every night when he is done. This drudgery alone would prevent "ME" from working more often than not. Oh, did I mention that if it rains... or even looks like it might rain... NO WORK. He doesn't have any of the luxuries that are often "TAKEN FOR GRANTED" when working in an enclosed, well lighted, dry... heated shop where he could just come home from work and walk through a doorway and pick up his tape measure and square and go to work on his pride and joy.

And Dave is not alone in this either. I am sure that many a boat builder works under these conditions.

I would like to share some of those luxuries here with Dave and any other readers that happen across my blog.

So to Dave and everyone that works in less than favorable conditions I take my hat off to you as a salute to your perseverance and dedication. More power to you !

One has to have a place to store the many tools that one can collect... and I have been collecting for a few years... Two drill presses (stand up model and a bench top model), radial arm saw, compound miter saw, band saw ( I love this... and I use it all the time), cherry picker, combination disc / belt sander, air compressor ( I waited many years for this ! ), air nailers and staplers and many other air tools like impact wrench, sanders, grinders etc..., cordless drills, circular saws and a host of many other tools.
My walls are covered with tools, clamps, gadgets and supplies that I've found necessary (or at least thought so). There are many shelves to store shop supplies like paints, epoxies, putty, cleaners, solvents, oils and on and on...
Like most small shops, I have built most of the shelving and storage devices used here, like the storage bin behind my bench grinder to organize the various grades of sand paper. My mountain bike is hoisted up and suspended in the rafters on a simple rope & pulley system. The cabinet in the corner (I did not build this) stores my books and magazines as well as my stereo system and shop music (gotta have my music.... I love music. At this very moment I'm listening to Kitaro's... Kokoro from his album "An Enchanted Evening, Live").
There are lots of storage bins / drawers for things like nails, screws, bolts, nuts, washers and so on (various different sizes). Anybody who works on things (a real "Do It Yourselfer") will eventually collect a boat load of this kind of stuff... and I like to stock many fasteners and supplies so that I don't have to dash out to the store every time I need a screw for this or a washer or whatever. I used to own my own truck (tractor trailer rig) so, I found it very useful to keep a well supplied shop. It just costs too much to pay someone else to do your work for you. Let's not forget about that ever so important "concrete floor" that my creeper rolls across so nicely............ :)
Last, but not least... you just got to have a refrigerator to keep your beer cold ! and close ! :)
Enough I say... Enough......................
Again, my hat is off to you Dave. Keep up the good work and persevere.

Friday, February 23, 2007

Shop Notes:

O.K.... Yesterday, after I got my cabin's cross beam (batten) set in it's jig, I mixed up some C.P.E.S. For those of you who don't know what this is, C.P.E.S. stands for Clear Penetrating Epoxy Sealer. C.P.E.S. is actually a two part (50/50) epoxy in a thin liquid form (until it sets up). In it's liquid form, it is about the consistancy of deisel and is used to coat wood (especially the end grain). When it sets up (dries), it seals the wood from future exposure to moisture. I get my C.P.E.S. from a company called "The Rot Dr." You'll find them at...http://www.rotdoctor.com/
Anyway, I mixed up a batch and began to coat parts. I've been making parts & pieces to complete the floor, the fuel cell's incloser, the cabin beams and so on for a couple of months now and finally some nice weather has arrived so that I can open up the shop and coat them. The C.P.E.S. is some really strong stuff... and highly flamable too. The first time I used this stuff I didn't wear a resperator. My neighbors (who like to lounge in their back yard all of the time) couldn't stand the smell from 150 feet away. Needless to say, I wear a resperator from now on.

That was last night. Today, I went ahead and decided to strip the rest of the cabin's inside walls as well as the inside of the cabin face. I was hoping not to (trying to be lazy I guess) but, after working with the cabin beams it was obvious that the cabin's side panels were quite loose. They wiggled side to side quite a bit. So, I made another exectutive decision... I would have to locate all of the screws that fasten these sides to the side deck, dig out the plugs (made of epoxy) and remove these screws one at a time and roll them in epoxy before re-inserting them and sinking them tight. There are 13 screws on each side.

Time to clean the shop and call it a night...
I like to sweep the floor every few days and make sure that my tools (not being used) are put away. There shouldn't be any more stripping, unless I've missed something.
See ya............................ :)

Thursday, February 22, 2007

Shop Notes:

Today I learned to bend wood using a steam box.

I needed to bend a length of Mahogony 3/4" x 2 1/2" x 54" for the cabin's cross beam.

I got the idea about how to build the steam box from my book by the Woodenboat Series... Frame, Stem & Keel Repair at http://www.amazon.com/Frame-Stem-Keel-Repair-Woodenboat/dp/0937822426

This book has some really great information about so many things.

The heater is of course my deisel powered salamander. The water tank is an old fire extinguisher that I had purchased a couple of years ago for $2.00 at a garage sale. It's made of stainless steel and it worked great. The steam box is a length of downspout from the gutter on the back of my wifes "Hut" behind the house. I usually use this downspout to channel water into a 30 gallon plastic drum, mounted sideways with a spigot on one end, so that I can collect rain water for my house plants.


It worked great too. The workpiece is currently laid up in the jig to set and dry. Now I think that I'll mix up a batch of C.P.E.S. and start coating some of the many parts I've made in the past weeks. It's a beautiful day outside and I for one am taking advantage of it.

Wednesday, February 21, 2007

Shop Notes:

Today was a productive day. Despite it's beginnings, I actually accomplished more than I set out to do. We'll start with last night....


Last night I was tired. I transfered some measurements from the boat to my workpiece, with the intent of cutting that piece today. Even after measuring several times, I just couldn't get the numbers to add up right. I finally realized my mistake, corrected it, remeasured and was satisfied. Time to give up and close shop.


Today, I went to the shop with the intention of just grabbing that piece and starting to cut. I recently read on another fella's blog http://davesboat.blogspot.com (he's building his boat from scratch) that one should measure four or five times... then cut. This prompted a memory from high school where the shop teacher told our class to "Measure twice and cut once". Makes good sense. So I grabbed the tape measure and measured the distance across the cabin where the last beam would be installed and then checked that measurement against the workpiece and I'll be... It was wrong ! Not a great start but, at least I didn't cut it out wrong. As it turned out, after remeasuring and making the needed corrections, that particular beam turned out to be the best of the three. The angles were right. The length was right. The arch was good... all in all I was very impressed with my work. Someday, I just might advance from a Wood Butcher to an actual Woodworker, if I'm lucky.


Anyway, I completed that beam, gloated a bit, and grabbed the bulkhead for another dry fit. Looks like it's going to need a bit of trimming in a couple of places. So, I haul that out of the boat and on to the bench for some marking and trimming. Another dry fit and all seems good. Wow, two for two...


I then removed the bulkhead and set it aside. Now I have to mark the center of the last beam and the center of the front of the cabin for the installation of a cross beam (a beam that runs fore and aft across the top of the cabin beams). After marking the centers I clamped a piece of 1" x 3" Mahogony stock across the beams and lined it up with my marks on each end. I then marked each beam where the cross beam intersected, to cut notches for the cross beam to sit in.


Time to give some credit to the man (or woman) who built my boat. This person has a lot of my respect because he was able to build a boat... probably several, and I am only learning to repair one as yet. But... I wish that I had a whole bunch of what ever he was drinking when he did some of his work on this thing... I mean, screws drilled in within 1/16th" (or less) from the edge of the wood. The beams were all crooked (spaced 15" on one side and 17" on the other ?). The cross beam... again, crooked... not even close ! An inch and a half off center on one end (this is what prompted me to remove the roof in the first place... so I wouldn't find myself laying in the cabin some peaceful night on the lake, staring up and thinking to myself "why didn't I fix that").


Ok, enough complaining... :)


I removed all three beams, one at a time, and cut the notches as needed. Had to attach a piece of stock on the cabin's forward wall at the top (above the hatch) to have something to secure the cross beam to... this is where the original one was installed an inch and a half off center and the screws were set in literally on the edge of the board. There was no other way to secure the cross beam here using the same holes and not enough space to redrill new ones. I'll have to fill those holes, as well as all of the other 10,000 holes in this boat, some of which I have already filled. That's something that I have failed to mention anywhere else in this blog. Many of the holes that I've encountered I have filled by inserting a piece of dowel peg rolled in epoxy. I've filled a lot of holes this way, fills the hole and seals it from moisture too.


It has occured to me today, during contimplation, that the average boat builder starts with a pile of wood and a set of plans and begins to build his boat... from that pile of wood up (frames, hull, cabin....). As for me... I had a boat to begin with. Then, slowly but surely that boat keeps getting dismantled, right down to a bare hull and frames almost. And then I get to build it back up. But, I haven't got any plans. I always have been difficult :)

Ok... after cutting the notches and reinstalling the beams, I went to install the cross beam and realized that this thing is going to have to be bent, steamed and bent. If I just attach it on one end and force it down, attaching it to each beam as I go, it's going to force the first two beams down, out of shape, possibly even causing them to fracture. Sooooo, off to the house we go to fetch a book that I know will give me the information I'll need for this proceedure. Frame, Stem & Keel Repair found here > http://www.amazon.com/Frame-Stem-Keel-Repair-Woodenboat/dp/0937822426 I have resourced this book many times and find it to be very informative.

I finished off the evening with setting up a jig to be used for bending my 1" x 3" for the roof and locating a suitable container to use as a cooker for my steam. Tomorrow I'll learn how to bend wood... with steam. See ya.............................

Tuesday, February 20, 2007

Shop Notes"


Today I finished the templates for the new bulkhead. Actually had to make two templates (out of 3/8" plywood), one for each side of the boat. The big thing here is, getting both templates lined up and spaced just right on the sheet of 3/4" plywood being used for the bulkhead so that when it's cut out and fitted into the boat it will match up on both sides like it is supposed to. I'll cut the thru-way out later before the final installation.


So many things started now, I'm starting to feel a little overwhelmed. The floor is started but, not finished. The same is true for the fuel cell inclosure, the roof and it's beams, the seating, the dash and now the bulkhead. I haven't actually started the seating or the dash but, during the quality time spent sitting on my stool, staring intently at my work and of course... soaking up some quality beer, it came to my attention some time back that before I can finish the floor, I must have a plan for the seating and how it will attach to that floor. Before I finish the floor I must install the bulkhead. Before I can start the bulkhead I must remove the cabin's roof and replace the beams. Before I can finish the beams I must have the bulkhead cut and shaped and ready to install. Before I can... and so on ... and on... and on !
I'm sure that everything will come together in the end. I just don't want to get to a certian point and realize that I've MISSED or FORGOTTEN something and then be forced to make an executive decission... do I just leave it like this ? or do I tear it apart and start over ???

Anyway... I made the bulkhead today and cleaned up a bit around the shop. I also got set up to cut the final cabin beam. It's all layed out and ready to start cutting. It was during this layout that I realized how tired I really was. When I get tired I start to make stupid mistakes so, it was time to quit. I'll cut out the beam tomorrow and fit it in on the forward side of the bulkhead. The bulkhead will actually be attached to this beam. This will give the cabin some well deserved additional support... Later................

Monday, February 19, 2007

Shop Notes:


Well, the break in the snow has allowed me to get in to the shop two days in a row... oh boy!
I removed the second cabin beam. I used the first beam as a template for the second one. Ordinarily this shouldn't work because each beam is a different length therefore, the arch will become greater as the beam gets longer or visa versa (which ever).
Anyway, the original beams are so warped and mis-shaped (and I suspect not made correctly either) that as I eyeballed across the top it was obvious to me that it would work out fine. And it did too. I traced out the beam, cut it, shaped the underside on the workbench and then installed it. Eyeballing across the top again I could see that there was plenty of wood that needed to be shaved off across each beam to get the overall arch of the roof to blend as it passes over each beam.
I did run into a small problem. While standing inside the boat using a surform to shave the topsides of the beams, I was looking down the cabin's side across the window (top down) and noticed that the top of each window was protruding out, somewhat twisted. I got out of the boat and looked down the sides of the cabin from the bow and indeed, the tops of the windows were being pushed out by the beams I had just installed. The beams were too long and the angle on the ends was slightly off (maybe 1 degree), just enough that the windows were really messed up. So, I surveyed each side and caculated in my head just how much wood needed to be removed from the ends of each beam and how much to correct the angles so that the windows would fall back into shape, made my marks on the wood and removed the beams. A couple more marks here and there... a few carefull brushes across the disc sander at a 4 1/2 degree angle and wallaa... Reinstall the beams and recheck the windows and... hey ! they don't look half bad...
I spent the rest of the evening carefully shaping each beams topside edge and started to make a template for the new bulkhead that I mentioned in my previous post. To be continued...

Shop Notes:


Good Morning to all...
Not a whole lot going on in the shop yesterday. Bought a few pieces of Mahogany to start replacing the cabin beams. The original beams are 15/16" thick. The replacement beams will only be 3/4" thick but, they will be a bit wider to maintain their structural strength.

Removed one beam. Cleaned it up a bit, removing the crusties and what not, so as to use it as a pattern to duplicate it's arch on the new piece of wood. The original beams were fastened with only one screw on each side. Why, I don't know, since this did allow them to "spin" if it were not for the roof itself preventing them from doing so. Seems to me that 2 screws on each side is the smarter choice, as well as proper drilling and placement of the holes. So, that is what I did.

I made the one beam, positioned it, marked and drilled for 4 holes... 2 on each side and installed the first beam. Performed the ever so complicated technique of "eyeballing" it's position, relative to the top of the cabin, and grabbed the rasp. A little shaving across the fore side of the beam, to give it some slope towards the bow, and all looks good.

Today, I plan to remove the second beam and repeat the above proceedures. When this is done, I'll have to remove both beams to give them a good sanding and treat them with CPES before they are reinstalled permantly. After the first two beams are completed, I'll be able to remove the third and final beam.

I haven't decided how I want to do this one though. I'm considering fabricating and installing a full bulkhed from hull to hull and floor to roof with a thru-way into the cabin. The reasoning for this is to fully inclose the fuel cell's box (which will be in the cabin under the bed). Also, this would allow me to design a larger, stronger dash to accomidate the new teleflex steering system and guages previously purchased as well as a switch panel & fuse box for the electrical system... To be continued...